

Gallery Walls Done Right: Planning, Spacing, and Hanging With Confidence

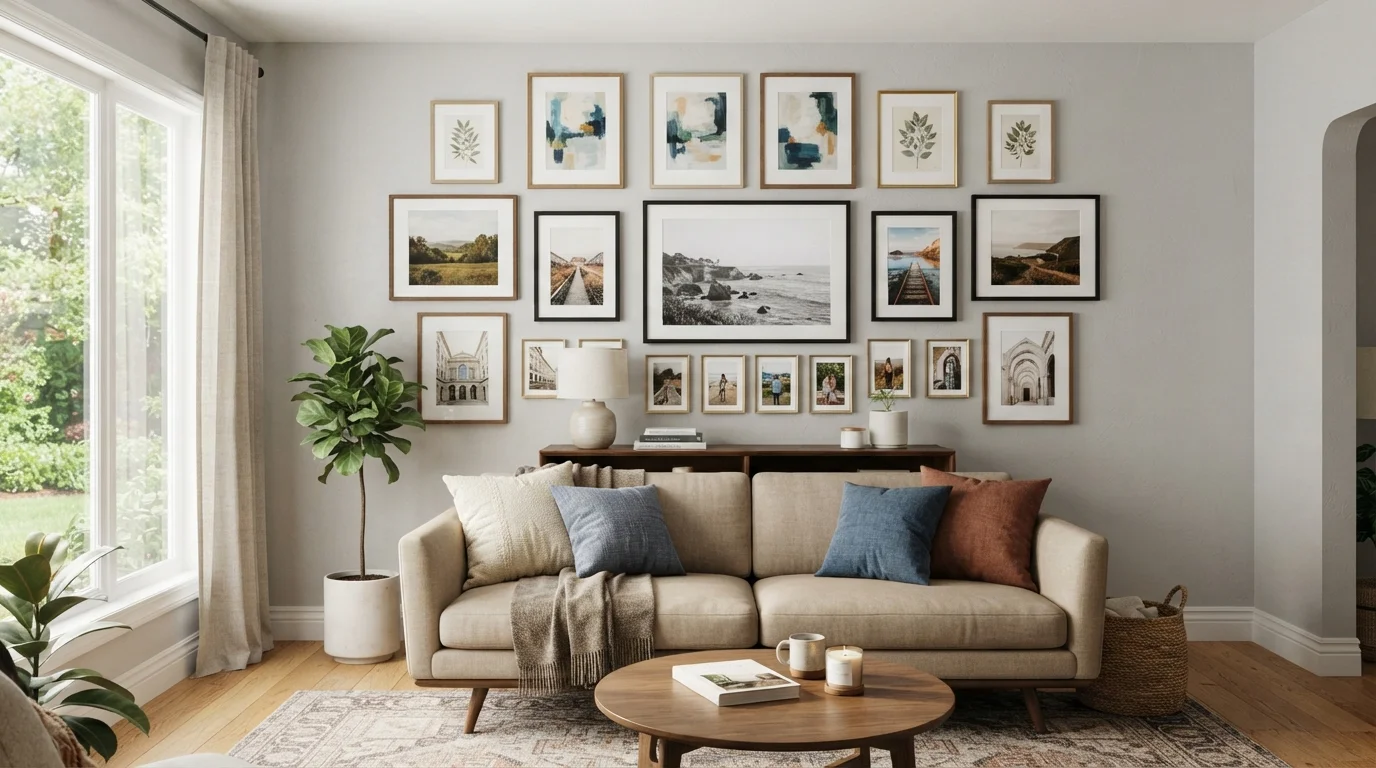
Photo: signaturehomeideas.com editorial
Key Takeaways
- Mapping your layout on paper or with paper templates before drilling saves time and prevents mistakes.
- Maintaining consistent spacing between frames, typically 2 to 3 inches, creates visual order.
- A mix of frame sizes works best when anchored by one or two larger pieces.
- Hanging heavier frames on wall studs prevents damage over time.
- Starting from the center of your arrangement and working outward keeps the layout balanced.
Why gallery walls go wrong before the first nail
Most gallery wall frustrations come from skipping the planning phase. Homeowners pick up frames, hold them against the wall one at a time, and end up with a scattered arrangement that looks accidental. A gallery wall reads as intentional when the spacing is consistent, the overall shape is deliberate, and the mix of sizes follows a loose visual logic.
Before you buy frames or choose a wall, it helps to work through a room styling checklist to confirm the wall you have in mind can carry the visual weight. Check that furniture placement supports the gallery rather than competes with it. Our guide on furniture arrangement principles covers how wall features and seating relate to each other spatially.
The wall itself matters. A gallery wall works on most smooth, painted drywall, but textured surfaces make leveling harder. Plaster walls may need different anchors. Know your wall material before committing to a layout.
How to plan and hang your gallery wall
Follow these steps in order. Rushing past the dry-run stage is the most common reason a gallery wall requires multiple attempts.
What you will need
Choose and measure your wall space
Identify a blank wall or section of wall where the gallery will live. Measure the width and height of the available space in inches. Write these numbers down. A gallery wall does not need to fill an entire wall; a defined rectangle roughly 48 to 72 inches wide works well above a sofa or console table.
Mark the outer boundary of your intended arrangement lightly with painter's tape so you have a visible frame to work within.
Gather your frames and sort by size
Lay all your frames face-up on the floor in the approximate space your wall tape defines. Group them loosely: large pieces (anything over 16x20 inches), medium pieces (8x10 to 11x14), and small pieces (5x7 and under). A balanced arrangement usually has one or two large anchors, several medium frames, and a few small ones to fill gaps.
Decide on a color or finish theme for the frames now. Mixed metals or mixed wood tones can work, but they need a deliberate pattern rather than random placement.
Trace paper templates for each frame
Place each frame face-down on kraft paper or newspaper and trace its outline. Cut out the shape. On the back of each paper template, mark where the hanging hardware sits: press the frame's hanging wire or hook against the paper and mark the contact point. This tells you exactly where to drive the nail.
Label each template to match its frame.
Arrange the paper templates on the wall
Use painter's tape to attach each paper template to the wall within your taped boundary. Start with the largest piece, positioning it slightly left of center or centered, then build outward. Aim for 2 to 3 inches of space between each frame; consistent gaps matter more than the exact number you choose.
Step back frequently and view the arrangement from normal viewing distance, around 8 to 10 feet. Adjust until the overall shape feels balanced, with no large gaps clustering in one area.
Locate studs for heavier pieces
For frames heavier than about 20 pounds, use a stud finder to locate wall studs before nailing. Studs are typically spaced 16 inches apart. If a stud does not fall where you need it, use a drywall anchor rated for the weight of the piece. Check the anchor's weight rating on its packaging before using it.
Drive nails through the paper templates
With templates still taped to the wall, hammer a nail through each marked hardware point on the templates. Drive nails at a slight downward angle (about 45 degrees) for better hold. Once the nail is in, tear the paper template away carefully, leaving the nail in place.
Repeat for each frame in the arrangement.
Hang each frame and check alignment
Hang frames one at a time, starting with the largest anchor piece. After placing each frame on its nail, set a level across the top edge and adjust until the bubble sits center. For frames with two hanging points, check level after both hooks are on their nails.
Once all frames are hung, step back and scan the full arrangement. Look for any frame that sits noticeably higher or lower than its neighbors. Small adjustments are easier now than after the paper templates are gone.
When your frames do not share a finish
This article is for general informational purposes. Wall construction varies, and heavier artwork may require hardware beyond standard picture hooks. When in doubt about your wall type or the weight of a piece, consult a hardware professional or a licensed contractor.
The content provided on our blog site traverses numerous categories, offering readers valuable and practical information. Readers can use the editorial team’s research and data to gain more insights into their topics of interest. However, they are requested not to treat the articles as conclusive. The website team cannot be held responsible for differences in data or inaccuracies found across other platforms. Please also note that the site might also miss out on various schemes and offers available that the readers may find more beneficial than the ones we cover.