

Giving Old Furniture a Second Life: Surface Prep, Paint, and Finish

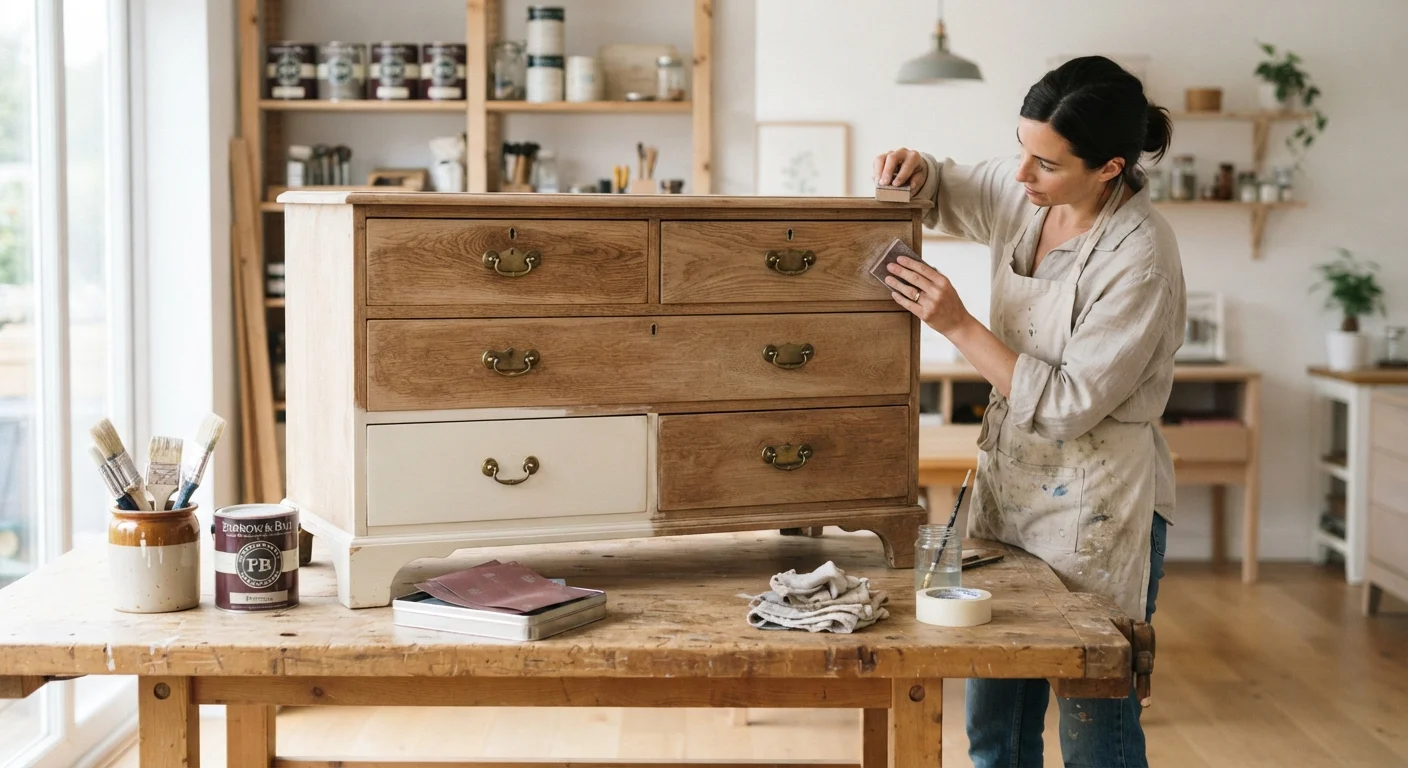
Photo: signaturehomeideas.com editorial
Key Takeaways
- Thorough surface preparation determines whether paint adheres well or peels within months.
- Primer is not optional: skipping it leads to uneven color and poor durability.
- A topcoat sealer protects the paint film and extends the finished surface's lifespan.
- Letting each coat dry fully before adding the next prevents bubbling and lifting.
- The type of existing finish on your piece dictates which prep steps you need.
Why surface prep determines the result
Most furniture refinishing jobs fail at the prep stage, not the painting stage. Paint applied over a waxy, dusty, or poorly sanded surface will lift, bubble, or peel within weeks regardless of paint quality. The goal of prep is simple: give the paint a clean, slightly abraded surface it can bond to mechanically and chemically.
The amount of prep work depends on the piece's current condition. A dresser with a sound, lightly scuffed lacquer finish needs a quick sand and a coat of primer. A table with peeling paint over layers of old wax needs stripping, degreasing, and possibly filler work before you pick up a brush. Identifying the existing finish before you start saves time and prevents wasted coats of paint.
If you are working through multiple rooms and pieces at once, the room-by-room furniture refresh checklist is a useful companion for deciding which pieces to tackle and in what order.
What you will need
Tools and materials you will need
Having the right materials staged before you begin keeps the project moving and prevents tacky surfaces from sitting exposed while you make a supply run. The list below covers what you need for a typical solid-wood or medium-density fiberboard (MDF) furniture piece.
Sandpaper (80, 120, and 220 grit)
Used to remove old finish, smooth repairs, and scuff-sand between coats for adhesion.
Tack cloth or damp rag
Removes sanding dust from the surface before priming or painting.
Bonding primer
Creates a uniform base that helps paint stick to slick, oily, or previously finished surfaces.
Paintbrushes (2-inch angled and a foam roller)
Apply primer, paint, and sealer smoothly across flat panels and detail areas.
Fine-grit sanding sponge (400 grit)
Used for light scuff-sanding between finish coats without cutting through paint.
Water-based polyurethane or furniture wax
Seals and protects the painted surface from scratches, moisture, and daily wear.
Screwdriver and painter's tape
Remove hardware before painting and mask off areas you want to keep unpainted.
Chemical stripper (optional)
Dissolves thick or peeling existing finishes that sandpaper alone cannot remove cleanly.
Step-by-step refinishing process
Follow each step in order. Skipping ahead, particularly skipping the sanding between coats, produces a finish that looks rough or lifts prematurely. The total time varies by piece size and dry times, but plan for at least two days to allow proper curing between stages.
Assess the existing finish
Before you sand anything, identify what is already on the piece. Run your finger across the surface: a waxy feel indicates furniture wax or an oil finish, while a hard plastic-like surface is likely lacquer, polyurethane, or conversion varnish. Wax and oil must be stripped or degreased fully, because paint will not bond to them. Hard film finishes can be scuff-sanded rather than fully removed.
Check for veneer by looking at the edges and undersides. Veneer is thin and can be sanded through easily if you use coarse grits aggressively. If the piece has veneer, keep sanding light and work with the grain.
Remove hardware and disassemble where possible
Take off knobs, pulls, hinges, and any removable legs. Store the hardware in a labeled bag. Painting around hardware leaves hard edges and often traps paint under the metal, which causes peeling later. If drawer boxes are separate from the frame, remove them so you can paint each surface independently and avoid sticking when the finish dries.
Strip or sand the old finish
For pieces with a thick, peeling, or waxed finish, apply a water-washable chemical stripper according to the product directions, then scrape off the softened material with a plastic scraper. Rinse with water and let the wood dry for at least 24 hours before sanding.
For pieces with a sound but glossy finish that just needs refreshing, skip stripping. Instead, sand with 80-grit paper to knock back any peeling areas or rough spots, then follow with 120-grit across the whole surface to create mechanical adhesion for the primer. Always sand with the grain, not against it.
Fill, repair, and clean the surface
Press a water-based wood filler into any gouges, holes, or deep scratches using a putty knife. Let it cure fully, then sand the filled areas flush with 120-grit. Switch to 220-grit and sand the entire piece lightly to smooth any cross-grain scratches left by coarser paper.
Wipe the whole surface with a tack cloth or a barely damp rag to remove every trace of sanding dust. Dust trapped under primer creates a rough texture that shows through paint no matter how many coats you apply.
Apply bonding primer
Brush or roll a thin, even coat of bonding primer over the entire piece. A foam roller leaves fewer brush marks on flat panels; use an angled brush for corners, carvings, and recessed areas. Let the primer dry to the time listed on the product label, typically one to two hours.
Once dry, lightly sand with 220-grit or a fine sanding sponge to remove any raised grain or brush texture. Wipe with a tack cloth before moving to paint. One coat of primer is sufficient on most pieces; two coats help on raw wood or heavily porous surfaces.
Paint in thin coats
Apply paint in thin, even coats rather than one thick coat. Thick coats sag, take longer to cure, and crack as they dry. Two or three thin coats produce a more durable film than one heavy application. Work in the same direction as the wood grain on flat surfaces.
Allow each coat to dry fully before adding the next. Lightly sand with a 400-grit sanding sponge between coats, then wipe with a tack cloth. This step removes dust nibs and gives the next coat something to grip. For furniture that will see daily use, three coats of paint over primer gives enough film thickness to resist light scuffs.
For a coordinated approach to updating multiple pieces across your home, the room-by-room furniture refresh checklist can help you plan the sequence room by room.
Seal with a protective topcoat
Once the final paint coat is fully cured (allow at least 24 hours, or the full cure time on the paint label), apply a protective topcoat. Water-based polyurethane in a satin or matte sheen is durable enough for tables, dressers, and chairs, and it does not yellow over time the way oil-based formulas can. Apply with a soft brush in thin coats, letting each one dry before adding the next.
Furniture wax is an alternative for decorative pieces that see light use. It produces a softer, more hand-rubbed appearance, but it requires reapplication every year or two and does not hold up as well on surfaces that get wet regularly.
Reassemble and cure
Reinstall hardware and drawer boxes only after the topcoat is fully dry to the touch. Even so, treat the piece gently for the first week. Most water-based finishes reach full hardness after seven days at room temperature. During that period, avoid placing heavy objects on the surface or scrubbing it with a cloth.
Test your paint color before committing
Common problems and how to avoid them
Brush marks: these appear when paint is applied too thickly or when the brush drag is too slow. Use a foam roller on flat panels and thin the paint slightly if it pulls rather than flows. A light sand with 400-grit between coats corrects most visible texture.
Bleed-through: dark stains or tannin-rich woods (like oak or mahogany) can bleed through water-based primer and cause yellow or orange patches in the topcoat. Use a shellac-based or stain-blocking primer on these surfaces before switching to your chosen paint.
Peeling at edges: edges and corners wear more than flat surfaces and are often sanded unevenly during prep. Pay extra attention to sanding edges smooth and apply primer to them with a brush rather than a roller to avoid thin spots.
The same principles apply when painting built-in cabinetry. The guide to painting kitchen cabinets without peeling covers the cabinet-specific prep steps in detail.
If refinishing confirms that a piece no longer fits its room, consider whether rearranging the layout might change its role. The furniture arrangement guide covers how scale and traffic flow affect where a piece works best.
This article is for informational purposes only. Finish products vary by formulation; always follow the manufacturer's directions for application, dry times, and safety precautions. Work in a ventilated space and use appropriate personal protective equipment when sanding or applying chemical strippers.
The content provided on our blog site traverses numerous categories, offering readers valuable and practical information. Readers can use the editorial team’s research and data to gain more insights into their topics of interest. However, they are requested not to treat the articles as conclusive. The website team cannot be held responsible for differences in data or inaccuracies found across other platforms. Please also note that the site might also miss out on various schemes and offers available that the readers may find more beneficial than the ones we cover.